Sunday, June 3, 2012

Leningen Versus the.... Deer?


           In recently comparing our respective garden progress, my friend Lisa told me she has four large gardens: three for their family and one for the deer.
            “What do you do?” she asked me. “Do you have a fence?”
            “Oh, no.” I waved the question away. “I haven’t really had problems with deer. I think it’s because I live in the midst of corn and alfalfa fields—they have much tastier things to munch on.”

            Apparently my nonchalant and foolish statement was the kiss of death. The next morning, my brassicas—my cabbage, cauliflower, and broccoli—showed definite signs of nibbling. Three entire plants were gone—ripped right out of the soil, roots and all.

            I’m not comfortable repeating in print my words following that revelation.

            Time to spring into action. In a blast of brilliance, I found a spare two-by-two board in the garage and used the circular saw to cut the end into a point. I went upstairs into our family dress-up closet and got out a pair of my father’s old veterinary coveralls. I stuffed the suit with rags and straw, and remembered that I had kept the control top area of a pair of nylons, the legs of which I had used to bag elderberries for winemaking. I knotted the legs, stuffed it with straw, knotted the waist, and tied an old floppy gardening hat on the top with craft twine. I pounded the stake into the ground right in the middle of the brassicas, tied the dummy to it with spare clothesline, and tied the nylon and hat head onto the stake and onto the dummy. Additionally, I found the parts of a large wind chime that had been ruined in a storm, took of some of the larger chime parts, and attached them to a stake in the far corner of the garden. They don’t chime all the time, but make the occasional loud and disconcerting clang that I hope will scare whatever fauna is considering plundering my garden. As the light diminished and it became too dark to garden, I wiped my hands on my filthy jeans and took a final survey of my kingdom—hopefully, this would work.
Meet Murray.

            I haven’t seen any new nibbling in a week, though the scarecrow startles me sometimes when I am alone working in the garden and catch him out of the corner of my eye. I have named him Murray.

            I have, however, discovered a new problem: something (an insect) is eating my kohlrabi seedlings as fast as they can sprout. I know that the conventional go-to response is to spray the seedlings with an anti-pest chemical; however I really feel like the whole purpose of personal farming is that one can feed one’s family confidently and healthfully, without worrying about contamination from industrial chemicals. I know that when I feed my baby son, I have fostered his food from seed to harvest, and he is getting the very best.

            That being said, something must be done if that kohlrabi is to make it onto his plate at all.

            This is one of the many instances in which I turn to my older, wiser, master gardeners. My mother, for example, swears by spraying the plants with a solution of Ivory Liquid dish soap and water. My step-grandmother, an avid lifelong gardener, says that a crushed garlic and water solution has always worked for her. Both seem to make sense, and I have tried both. Last year, I sprayed the garlic solution on my beetle-bitten roses, and it seemed to work somewhat (I still noticed some arthropod snacking, but not as much). My application of the Ivory Liquid solution scorched one plant, but I also applied it in the late morning on a hot day (not smart). This time, I tried something different.
Kohlrabi in trouble

            Since my son became (a) mobile enough to follow me everywhere, (b) super-“helpful” and interested in helping Mommy clean and (c) overly willing to put everything in his mouth, I have switched from industrial cleaners to a simple white vinegar, water, and lemon juice mix for daily surface cleaning. I simply took this mixture in its spray bottle down to the garden and sprayed the seedlings. Will this be effective? Stay tuned.

Another danger: Giant slugs. A quarter in the middle for scale. 
            I do sometimes feel like the protagonist in that Stephenson short story “Leningen Versus the Ants.” For those unfamiliar, the upshot is that an overly confident white land baron buys a Brazilian plantation and pooh-poohs the natives’ warnings about the ants. When the ants come in killing swarms, he is sure he can triumph easily. He tries all sorts of schemes, only to be bested by Mother Nature, and ultimately barely escapes with his life. The takeaway: in our human effort to control our natural environment, only so much is wise and possible.


Tuesday, May 29, 2012

Urban Gardening Part II: From Grocery to Garden


A beautiful herb garden can be grown from grocery store produce.
The serious problem for the true urban gardener is the total lack of nearby seedling farms or greenhouses. Even if one was perfectly set up to rooftop or balcony garden, where would one get those healthy garden-ready seedlings? What is available however is high quality, gourmet or organic small grocery marts that tend to cater to the upper-middle class busy career-person who grabs dinner ingredients on the way home. Produce at those stores is often fresh and presented in a way that reminds the consumer of the natural environment, lulling (and selling) them into believing they’ve plucked it right off the farm.

Take advantage. Much of this produce still has roots. Most fresh herbs, like basil, cilantro, oregano, or chives can be potted and placed in a sunny spot for much more than one dinner’s worth of seasoning. The same can be done with leeks and spring onions; fennel, kohlrabi, and dill can also be bought with roots.  Anything looking young and fresh and still retains roots could be viable… try it out.  (I would, however, let anything that looks a little wilty rest in a glass of water for twenty-four hours before planting, and always make sure to drench the plant after potting—that’s how the roots get settled. Afterward, water normally.)

Paradoxically, old plants can be equally valuable. If those potatoes you bought for a dinner party a month ago are sprouting eyes, or if you see some for sale on the cheap, cube them—making sure each cube has at least one growing sprout—and leaving enough potato meat (remember that is the sprout’s food)—and plant them. If you left the garlic on top of the fridge and completely forgot about it, only to rediscover it with a green shoot, plant it (making sure to separate cloves and planting each one individually) and see what happens. Again, urban gardeners have the advantage of climate control: when planting garlic outside, one must be careful to plant softneck or hardneck garlic appropriately (softneck garlic doesn’t do well in northern climates)—however if planting indoors, all sprouting garlic bulbs are fair game.

And don’t forget that every vegetable you buy has a seed that can be planted. If you find a particular variety of vegetable delicious, save the seed and plant it. (Especially rare ones!) This is elementarily easy with squash, cucumber, and pumpkin, but tomatoes, okra and peppers can also be successful with a little care. I would wash the individual seeds carefully, then dry them out in a paper towel sandwich for a few weeks. Store them in a cool, dry, dark place for the winter months, and then plant them in potting soil as soon as your USDA zone dictates.  (Don’t know your zone? See my post on growing steady in moody weather for the link.)
  
Pits can also be fun. Don’t forget that within every avocado, fresh fig, date, peach, and mango is a glorious potential tree. These take tons and tons of patience, but are a point of pride if you can pull it off. For these, bore three holes in the pit with toothpicks at a forty-five degree angle. Leave the toothpicks in, and use them to suspend the pit over the lip of a glass (I use a mason jar). Fill the glass with water until the bottom half of the pit is covered. Make sure that the level of water in the glass in maintained. Set it aside and prepare to be very, very patient. Once it sprouts roots, bury it in potting soil.

Attempted avocado cultivation from pits: month four. 

For best results with all plants, adhere to seasonal rules. Plant garlic in the fall for next summer’s bounty.  Store dried seeds and plant them in pots in the spring, then make sure they get plenty of water and sunlight.  The most important virtue in gardening, urban or rural, is patience: Mother Earth marches to her own beat. 

Thursday, May 17, 2012

Progress Report


Progress Report

     In the academic world, it’s progress report time, when many students either rejoice or despair in the fact that this is “only a drill.” In that same spirit, I thought it useful to assess my own progress.  (In true teacher fashion, one always begins with the positive.)

     What I’ve done well:

     After about eight weeks, the chickens are still alive—and growing fast! Although it is still a tad too early, I peek hopefully into the coop every morning for those ethereal and edible artifacts of chicken achievement. Not yet.

     I’ve attributed this year’s continual chicken survival to a few factors: firstly, they (unfortunately) don’t free range. They do however have a roomy and open pen which they seem to enjoy. They have sunny spots, shady spots, and shelter when they want it, and are protected by a large cube of chicken wire (as I mentioned in a previous post, the bottom is buried so they have grass).  We also recently adopted a dog, Jude, an Australian shepherd mix who does a pretty good job of marking his territory. I haven’t seen hide nor hair of fox nor weasel since then. In fact, my husband has taken to redistributing our new friend’s doggie droppings to the perimeter of the chicken coop, and then our property, just in case. Though my dream of clucking followers (termed like this, I begin to think this dream was a tad megalomaniacal) may not come true, at least content chicken survival is, so far, possible.

     Secondly, after years of planting in flat beds and battling weeds and drought, I’ve decided to try a different method. In my 60’ x 60’ vegetable garden, I planned out different size oblong beds and, with a garden hoe, dug them into raised beds with paths in between. The beds range from 4’ x 4’ to 3’ x 6’, and are arranged with companion planting and crop rotation in mind. The idea is that with these “raised” beds I have specific paths on which I can walk, thus inhibiting weed growth, and from which I can easily harvest without worrying about damaging plants. Also, I wouldn’t have to rototill every year and damage the structure of the soil; instead, the paths would become compacted and I could gently work in manure and compost to only the bed areas as needed. Rotating crops would also become incredibly easy. I am aware that most conceptions of "raised beds" require some kind of solid perimeter,  but the whole permanency of that kind of experiment seems unwise-- Lewis Carroll would ask, "What if this doesn't work at all?" With a simply dirt-mounded structure, I feel like I can give it a whirl and plow it all under if I don't like it. 

     What needs improvement:

      I’ve done some experiments with hydroponics this spring with mixed results. After waiting until my easy-grow seedlings (i.e., peas and beans) were well-sprouted, I gently dug them out with my forefinger and transplanted them, soil still clinging to roots, into glass vases filled with plain filtered well water. I experimented a little bit: I put some of each kind of seedling into clear, red, and green glass vases and plunked them on an indoor shelf in the sunlight.  In my results, regardless of glass color, my bean seedlings are healthy (and one has even flowered) while my peas are wilting away. My lesson so far is that peas need more nutrition, not necessarily that they can’t be grown hydroponically. More work to be done on this. Perhaps not warm enough? Started too early?

     Also, I need a better garden water system. Right now, I run a hundred plus feet of hose from my house to my garden and water first thing every morning. Even with that length, the hose doesn’t properly reach all corners of the garden. This is pure laziness on my part. Must revise to a better system.


     What I’ve learned:

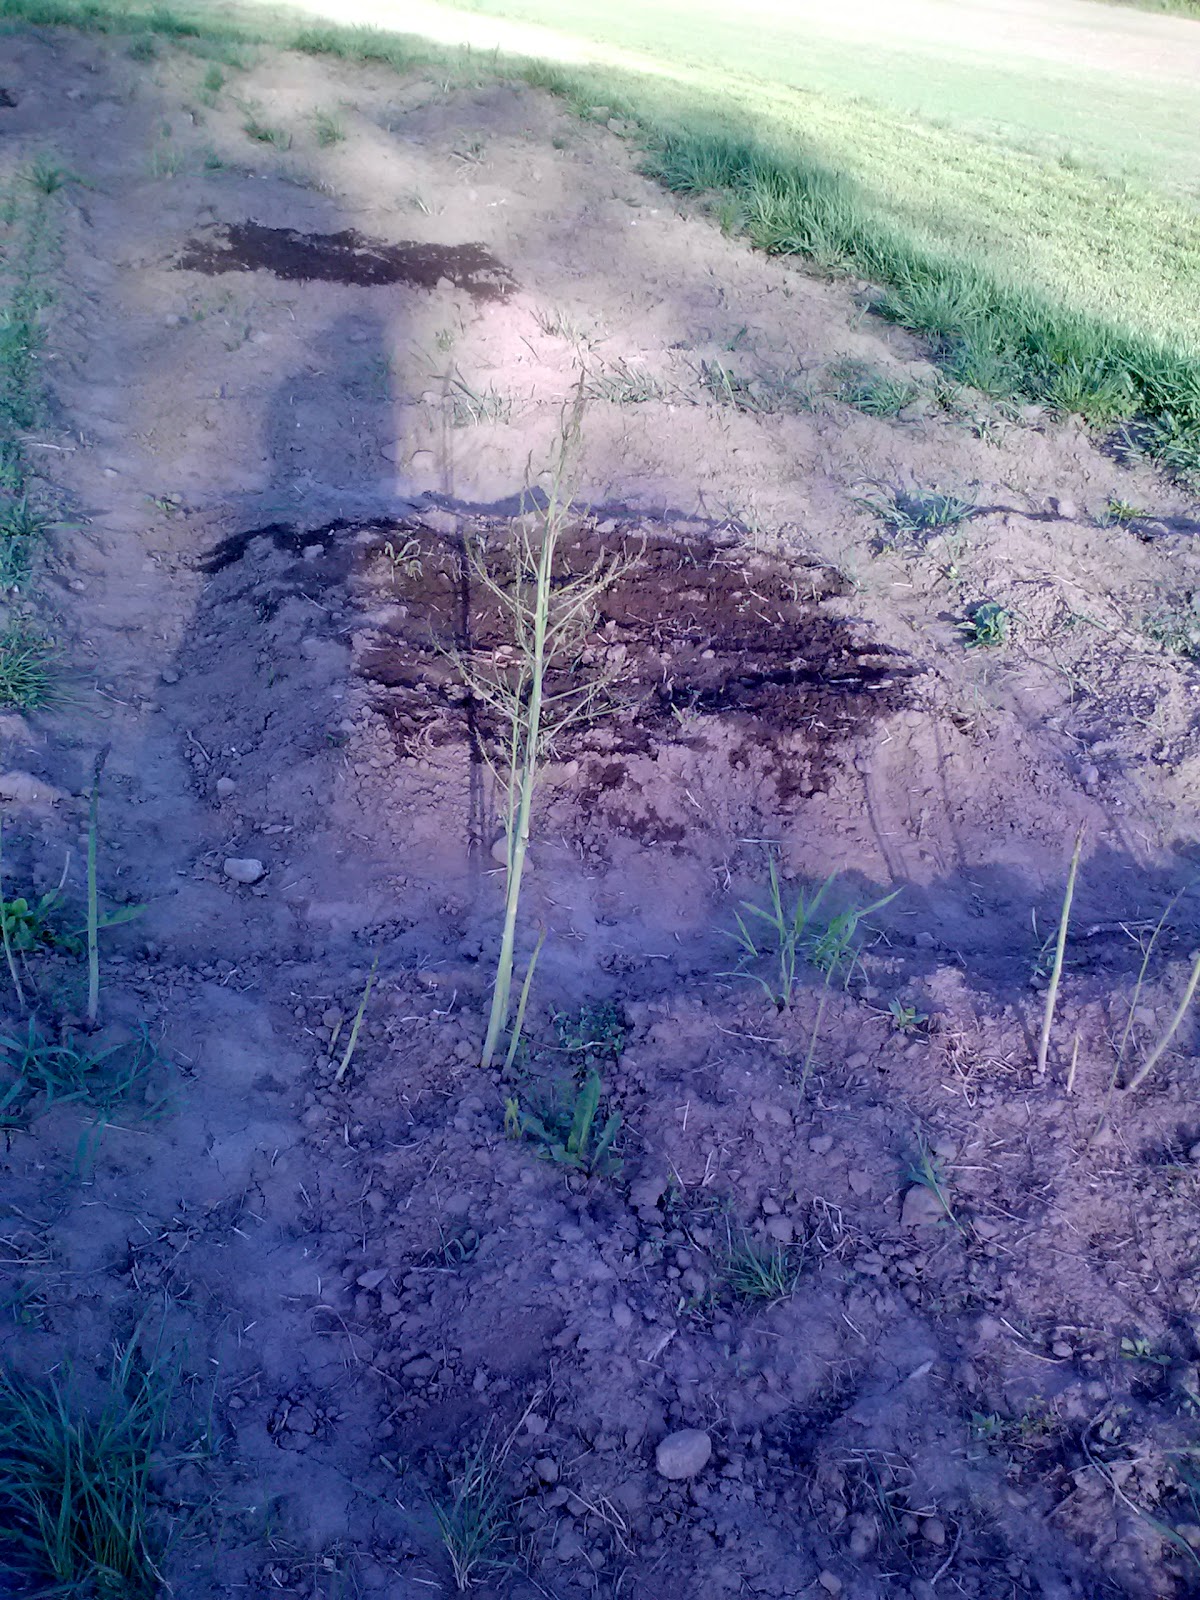
     Firstly, to my relief and excitement, I have learned that, apparently,  it is really difficult to kill asparagus. Last October my father, who owns a proper full-time farm, was “coming by” with the tractor and disker and offered to turn over my garden for me. I quickly and rashly accepted, thinking of the labor it would save on my part, only to want to smack myself fifteen minutes later. I had planted asparagus, a perennial, in the southwest corner of the garden, and he had disked over it.

Asparagus rise! Carrot and beet raised beds beyond.
     I was absolutely distraught all winter. I had painstakingly dug asparagus trenches, carefully planted them, and, with baited breath, watched them grow, knowing that it would be three years until I’d have my first asparagus crop. And I’d have to start again.

     However, this spring, that lovely tenacious asparagus reappeared. Not where I had planted it, of course (apparently the worst it had suffered at the mercy of the disks was displacement), but it reappeared nonetheless. I will not, however, be testing its tenacity again.

     Secondly, I have learned that no matter how much reading, planning, and debating I do over the winter, I will inevitably change my garden plan once I get IN the actual garden. I am on my fourth garden map right now, and am still in a process of revision. While I try to adhere to the rules of companion planting, my ideal garden changes depending on the varieties of vegetables available that year as well as the weather pattern of the planting season at hand. I thought I had constructed my final draft plan in February, but now find I am using that “final draft” as a reference to guide what I’m actually doing. So far, I have parsnips, carrots, and onions in the ground, so at least that part of the map is immutable.
200 Onions, red and white, in their own "raised" bed.


     What I have really learned from this? Thinking about the garden is fun year-round, even if it’s only a drill. 

Monday, May 7, 2012

Bread and Jamnation!


As a rule, I make an effort to shop small, local businesses rather than the national chains. My favorite thing about my local family-owned grocery is that, rather than throw out day-old or bruised produce, they sell it in paper bags off a shelf in the back of the store for drastically reduced prices. You might get four pounds of week-old parsnips for a dollar, or a bushel of slightly bruised apples for the same price. It is fantastic. Not only am I a fan of avoiding waste (in many other countries of the world, not only would these beautiful fruits and vegetables be unavailable, but folks would argue over them); I am an inveterate bargain hunter and can make something delicious out of the most overlooked of nature’s bounty.
            Thus, I have recently become addicted to jam-making. At first, this process seemed incredibly intimidating. Not so. Making jam is perhaps one of the easiest culinary adventures out there. The necessary ingredients are few and easy to procure, and the space to creatively riff on your product is infinite. Jam is the waste-free, backyard-farming individual’s answer to windfall produce—whether you grew it or simply acquired it cheaply. Here is really the only rule: simmer it down for a long time. Until it’s ready. Jam-making needs patience. You don’t actually need extra pectin or sugar if you take the time to make sure the mixture is boiled to almost solid. Keep on low heat and stir often.

Following are some of my favorite unique creations:

Pineapple Chipotle Jam
1 whole pineapple, finely chunked
1 cup brown sugar
4 cups water, plus extra
2 tbs crushed chipotle pepper

Boil the water; place the pineapple chunks and sugar in the water and reduce heat to medium low. Throw in hot pepper. Cook , stirring about every five minutes, until there is no water left and pineapple even burns a little bit on the bottom of the pan. Turn off heat and stir into a jam-like consistency.

Black Onion Jam
3-4 medium white onions, sliced very thinly
½  cup olive oil
½ cup maple sugar or molasses
2 cups water

Caramelize onions in olive oil. Add water and sugar; boil down until very thick.

Nectarine Brown Sugar Jam
2 lbs nectarines, pitted and diced
2 cups brown sugar
6 cups water
1tbs cinnamon
 
Bring water to a boil, then add nectarines, sugar, and cinnamon; reduce to a simmer. Simmer until a thick, jam-like consistency is achieved. This will take more than an hour (probably almost two).

Once you’ve mastered these, you can get a little fancy…


Smoked Vanilla Pear Jam
4 cups water
6 pears, any variety, chunked
4 medium apples, any variety, chunked
1 cup olive oil
2 tbs pure vanilla extract
1 tbs lemon juice
2 cups sugar

Rub a baking sheet with a little olive oil so the whole surface is coated. Spread fruit onto the sheet and drizzle with the rest of the olive oil. Bake at 400 F until soft and slightly browned (or even a little burned—this will only help the flavor). Bring the water to a boil and scrape in the fruit. Add the sugar, vanilla, and lemon juice; simmer until a jam consistency is achieved.

Sweet Jalapeno Jam
4 cups water
1 medium white onion, minced
¼ cup olive oil
1 tsp cumin (or more to taste)
2 cups brown sugar
½ lb jalapenos, diced
1 tbs lemon juice

Rub some olive oil onto a baking sheet and scatter jalapenos and onions on it; sprinkle with cumin. Bake at 400 F until onions are caramelized and you see black smoky spots appearing on the jalapenos. Boil water and add jalapenos and onions. Add sugar and lemon juice. Reduce to a simmer and cook until jam is achieved.

As you can see, there is a pretty predictable pattern involved here: fruit, sugar, water, boil. Acid (lemon juice) if you want to can anything. So easy and fun to deviate from the normal.

Making my own jam also appeals to me in the sense that I’m controlling the sugar content. Now, when I’m post-maple season, I actually use maple sugar, which is rich in minerals and amino acids, instead of refined and barren white sugar for all my recipes. (About a tablespoon equals a cup if making this substitution.) There is of course also the omnipresent aspect that I know (only to a better extent, of course—but control the controllable, right?) what is in our food and where it is coming from. I know it is natural, chemical and preservative free, and good for my family.

            With the same mindset, I also began making my own bread regularly about two years ago. At the store (yes, our same small-town local grocery) I had a strange tipping point: I looked at the labels on all of the breads that were advertised as “whole wheat” or “whole grain” or “heart healthy” or “no additives” and found that they all had ingredients that were not whole grain, or healthy, or natural. I make two loaves of bread twice a week, and have found that not only does my family like it better, but I am so much happier feeding it to them. Here is my favorite recipe:


1 cup oatmeal
2 cups boiling water
2 1/4 tsp. bread yeast
1/3 (or so) cup warm water
2 tbs olive oil, plus more
1 tbs natural maple sugar (or molasses or honey if you don’t have access to natural sugar)
1 tsp salt
4 cups whole wheat flour


Put oatmeal in a large mixing bowl. Pour boiling water over it and let it stand an hour, until all the water is absorbed by the oatmeal. Make a yeast starter with the yeast and water and let stand 15-20 min. Drizzle olive oil over top, sprinkle sugar and salt, and mix thoroughly. Add yeast starter. Mix in flour one cup at a time, until saturated. Let rise over night. The next day, grease two loaf pans with olive oil. Divide the mixture and let rise again over night. Bake at 350F for an hour or more, until a knife comes out clean.


I write this as a fresh pear jam batch comes off the pot—looking forward to breakfast!

Sunday, April 29, 2012

Growing steady in moody weather


T.S. Eliot was right: April IS the cruelest month. Two weeks ago it was sunny and seventy degrees; I tidied up flower beds, planted bushes and trees, and, most rashly, started beans, cucumbers, peas, artichokes, and cilantro. Kale, collards, and spinach were sprouting happily in the cold frame. Last Monday morning, I woke up to six inches of snow.

            Though the vegetables I had sown are technically “cold-weather crops” I have found that my assessment of cold spring temperatures and the seed companies’ varies quite a bit. Here in far Upstate New York, winter is over when ice stops crystallizing on your face (this is also known as the beginning of flip-flop season). Apparently, true “cold crops” are usually sown when the temperature is reliably sustained at around sixty-five degrees (up here we call that bikini weather). Considering our growing season is really only about four months long, different understandings of what it means to be "cold" or "warm" (which up here we actually never achieve for very long) really matters for one's harvest. 

            I could only think one thing: thank the gardening gods I container planted. In my earlier posts, I mentioned how much I admired my friend Julia’s container cucumbers. Determined to do the same thing, I started scarlet runner beans, pickling cukes (my favorite), and sugar snap peas in single-cell containers right after St. Patrick’s Day. As they started to grow (and they grow quickly!) I filled twelve-inch-deep containers with a bottom layer of composted cow manure and topped it with potting soil. I made a few very simple trellises from dry sticks (grape vines are also very helpful here, depending on how you want your vines to grow-- perhaps in fun shapes?) and stuck them in a triangular formation in the rear of the pot. I then planted each pot with combinations of beans and cucumbers, and planted hanging baskets with peas. I placed them all in front of a window in my back kitchen which is separated from the house and is maintains a constant fifty-five to sixty degrees.

            When the weather was still warm, I began the process of hardening seedlings that had developed at least two leaf sets (this is important—you don’t want to start them too early). I have learned from experience that planting indoor-sprouted seedlings directly into the great big wide world is seldom successful. Most expert gardeners say that leaving the seedlings outdoors, in their nursery cells, for a few hours a day (providing the day is a lovely one) helps them to harden and acclimate to garden life. Through this process, the seedlings can experience harsher climate factors—direct sunlight, winds, even temperature fluctuations—and get used to them gradually before being permanently placed in them.  Thus, I had first hardened my seedlings in their primary sprouting cells, and then had set out the containers entire when they were comfortably planted. When colder evening temperatures set in, I whisk them back into the house for shelter. Voila: a literal (potential) moveable feast. 

            Currently,  my beans are about eighteen inches high with a  healthy growth of leaves and my peas hang from their perches about the same (the cucumbers seem to be waiting for some warmer weather). They have been largely living in the back kitchen as the weather has been lousy this past week, but they got to see some outdoor sunshine today. While (as always) I’m a little nervous that I began too early, if all continues to go well, I’ll have a very early veg crop this year. 

Don't know your gardening zone? Check here.

Monday, April 9, 2012

Eating Your Lawn Part II: the Awesomeness of Dandelions


I held Easter dinner at my house this year for about fifteen friends and family. In developing the menu, I wanted to stick to a spring theme: early vegetables, in-season game, and savory but light seasonings. For the first course, I planned a split pea soup with my own oatmeal wheat bread, herbed butter, and a light spring greens salad. Though I planted mesclun greens, spinach, and kale in the cold frame during a warm spell a few weeks ago, the seedlings were definitely not ready to be called anything near salad-ready. I had resigned myself to that great evil that cooking for a large group often necessitates—the trip to a bulk produce store (shudder)—when an epiphany occurred. 

Early Friday morning I puttered around the lawn with a can of salt, finishing off the last stubborn vestiges of my thistle invasion, and then decided to get a head start in weeding one of the flowerbeds. Even from a distance, I could see that young “weeds” were sprouting up more quickly than the Echinacea, gerbera, day lily, phlox, or honeysuckle I had planted.
           
I had pulled about a dozen young dandelion plants from the bed when I stopped dead.  I couldn’t believe I hadn’t thought of this before. Here I was, “weeding” young dandelion greens when I was planning a large salad only a day later!  What a waste!

Though the dandelion is a weed to most of us, this delectable and nutritious plant is actually quite a boon to have around. Each part of the plant is delicious in its own way, and can be used for different purposes. Pluck the young greens (before the plant has flowered) for high iron and vitamin C veggies that also have detoxifying properties. If you look closely, a greens floret will have a small bud nestled in the center. This is the jackpot. They are absolutely tender and full of vitamins. Toss them right into your salads. Once the dandelions bloom, pick the young yellow flowers and eat them raw or sauté them in olive oil and salt until slightly crunchy for the maximum delivery of liver assisting detoxifiers. The root, dried and ground, makes a great tea any time. If you aren’t ready to use your young dandelion greens, flower, or root at the time, dry them in the sun and crush them using a mortar and pestle. They are amazing added to a stir-fry, rubbed onto meat, or mixed in a soup.

This plant is undoubtedly as useful (and most likely more nutritious) as the industrially farmed and processed spices and herbs for which we pay a lot at the grocery store. Our unfortunate mentality tends to be that if we pay for something at a store, it must be of better quality and better for us. Often this is false, particularly so in the case of our dear friend, the dandelion. As we simultaneously seek food that is not chemically treated and does not leave a carbon footprint, yet is also nutritious, it seems that the dandelion is the ideal solution. With plentiful dandelion greens growing within our sight, no chemicals or trucking necessary, it would seem very nearly foolish to go to the store.

So I served dandelion greens and young buds to accompany my pea soup and homemade bread; if I can judge by the fact that none of the salad was left after dinner, it was a hit. I dressed it in olive oil, garlic, lemon juice, mustard and, since dandelion greens can be a tad bitter, a bit of honey. Delicious. Next time you’re hankering for a gratifying and green gourmet experience, look no further than your back yard.


Friday, March 30, 2012

Urban Gardening: Part I


Last fall we helped move our dear friends Colter and Julia from one rental to another. While Colter and my husband, Jeff, were focused on trying to fit as much furniture as possible into the U-Haul, I was (I am almost ashamed to say) focused on Julia’s magnificent pot-patio cucumbers.
            My cucumbers colossally failed last year. Even companion planted amongst beans, radishes, and turnips, and despite vigilant watering and de-bugging, their vines shriveled and were lost in the surrounding foliage. Was it too much sun? The pH of the soil? Some pest yet unknown to me that invisibly attacked? I racked my brain—I had planted these varieties before, under similar conditions, and they thrived—what was different?
            I had struggled with these questions all summer, and when I saw Julia’s cucumbers I realized my self-examination and reproach was—well—irrelevant. As the wise denizen of a rented space, yet avid gardener and supporter of self-sustainable living, Julia had grown her whole garden in pots. Her efforts were extremely successful. My efforts, in a permanent space, were not so; why was I torturing myself over soil pH when that was a factor I could control for success through potting rather than planting?
            When I was living in London and earning my graduate degree, I had a balcony garden consisting of a few herbs and bulbs in oblong boxes, through which I strung a laundry line. Not that impressive, I know, but it cheered me up while I hung up the whites and darks to dry. At that point in life, I was looking forward to the someday-garden; it occurs to me that I could have had the now-garden then if I had really thought about temporary planting.
            Julia’s model, for me, exposes not only what I could do with pot gardening in my farmhouse, but moreover the possibilities open to an urban gardener. Pot gardening actually opens up a world of opportunities for the city home grower: for one, unlike a permaculture gardener, the pot makes the gardening zone almost irrelevant. You can take your pot inside and out, for sunshine and rain or for warmth and shelter. The following are just a few ideas on how you could turn your city dwelling into a gardening paradise.
Preliminaries: If you’re going to have an urban garden, composting is really important. Make your own by poking holes in the lid of a big, dark colored (black if possible) coffee can and placing the can (lid on) in a sunny area where it will get hot. Hot compost decomposes fastest because the heat helps break down the organic matter. What goes in compost: any veg or fruit waste (carrot peels, apple cores, onion skins, etc.); eggshells; coffee grounds (these are AWESOME for plants. You can actually put them right in the pots with the plants), and wood ashes (like from a fireplace). What does NOT go in the compost: any kind of animal scrap: no bones, fat, skin, tablescraps—you get the picture.  Also, cigarette ashes are toxic (obviously). Shake it daily. This quickens the process. It’s ready when it looks like dirt. Mix roughly one part compost to six parts potting mix for plant nutrition. Don’t use it if you can still spot recognizable food remnants. Or, if you’re continually adding to it, use a tablespoon to spoon out soily parts. Occasionally in the meantime, and through the holes in the lid, you can pour the compost “tea” into potted plants as fertilizer. Not too much (it’s potent).
Container Gardening:  If you have a full sun area such as a balcony or space beneath a skylight, I recommend tomatoes. They really really need a lot of sun and are prolific if happy. Heirloom varieties are cool looking, prolific, delicious, and impress your friends. Buy seedlings unless you have a lot of time and patience (order these online from a local nursery). Cherry varieties don’t really produce a lot of food, but are pretty. Run-of-the-mill Beefsteak or Big Boy are fine, but nothing special. Only grow Roma if you plan on making sauce—not as tasty. Choose a good three to five gallon container and stake the plants up vertically with long sticks or dowels and tie them upright (using zipties works best). Plant the seedling in the center of the pot. Around the plant, sow (only a few) carrots or plant basil. They make each other healthier and tastier.
            Cucumbers also need full sun but almost no space if you provide it with something to climb on. (You have to deliberately train them to whatever that is.) And they can be a really attractive vine. Pickling varieties are crisp and grow fast. These can be grown pretty easily from seed. Or, plant beans (also can be started from seed) in your cucumber containers. The bean will use the cucumber for support and they benefit each other.
            Many think that more substantial winter veg, like squashes, pumpkins, and zucchinis, can’t be grown in an urban setting because they’re so space consumptive. Not true. Just prune them. Start them from seed, give them something to climb on (this could even be a kitchen wine rack or pot holder—just make sure there is sun), and prune the vine to the desired height. Only allow the plants to make two or three blossoms, and watch then to make sure they mature and pollinate, then wait until the following buds bloom, nip them off, and EAT THEM. Squash and pumpkin flowers are delicious battered in olive oil or stuffed with onions, rice, and peppers.  Then the plant will only put its energy into making two or three monster fruits and it won’t take over your space.
            Sweet potatoes are super easy to container garden and can tolerate partial shade. When the vine dies it’s time to harvest. If you give the plant enough room you can get half a dozen medium potatoes from one plant. (Only plant one per container.) Plant leeks around the plant from seed—you will know when they’re ready because they will start to look on top like what you might buy at the store.
            There is also an added perk to indoor gardening—climate control! This means you can grow plants that might ordinarily be out of your gardening zone. If your apartment is reliably warm (sixty five degrees or so all year) try a potted fig tree, or if you have more room, a dwarf stone fruit like a cherry, peach, or plum.
            Finally, we must address the practicality of the process: the perk to urban gardening is that you really don’t have to worry about insects. Thus pest control is not a headache. The problem, however, is correlative: no insect equals no pollination. You may have to self-pollinate some of these in the absence of beneficial insects. Think of this as artificial insemination for plants. Quick lesson: just make sure, at some point, that the pistil touches the stamen and that pollen is transferred. You’ll feel a bit icky, but just wash your hands afterwards and watch a Disney movie. You’ll be fine.

Lots more small-space gardening discussion to follow, but not enough time to write it down yet. Stay tuned. 

Monday, March 26, 2012

Chicken Farming-- Take Two


I have a dream. In my dream, my free-ranging chickens roam about the yard, happily plucking insects from the grass, their soft clucking signaling their contentment as they follow me around. They greet my delighted son at the back door as he exits with a basket to collect their fresh eggs. At night, I shoo them into their cozy hay-lined coop where they nest safe and sound until morning.

Last summer’s attempt to attain this dream of pastoral perfection perished tragically.

In April, in accordance with my specifications, my husband built a beautiful sixty-four-square-foot chicken coop from bits of leftover lumber, complete with a flip-top roof for easy egg collection (protected properly with shingles left from our latest roofing project) and chicken wire floor so no predator could dig into it.  

In May, I bought six, six-week-old “pullets” (note skeptical quotation marks) from the local tractor supply store and asked when they would begin to lay: about twenty weeks was the answer I received. They lived in an open plastic bin lined with sawdust with a heat lamp overhead for six weeks or so until finally they were ready for the great outdoors.

In mid-June, they moved into the chicken coop (keep track of the math here; that would make them twelve weeks old). Every day at dawn, I fed and watered them and opened their door so they could get out and start picking those tasty insects off the lawn (soft contented clucking would surely follow); each evening at dusk I shooed them back into their coop and locked it up so they could indeed nest safe and sound.

In mid-July we had our first run in with the fox. Out to dinner one evening with friends, we came home a little after dusk (okay, it was firmly dark) to encounter a terrible turn of events had occurred.  We found four very scared chickens in the garage rafters; we found two very large piles of feathers on the lawn. Chickening fail.
We mourned, and then I bought ten more.

At first we would only see him skulking about in the evening, but as the corn grew higher and as August progressed, the fox grew braver. Finally, he was hiding just inside the first row in broad daylight. He started attacking and dragging them off, one by one. I started let the chickens out when I was out too, and shut them back in when I went inside. This was not the glorious free-ranging situation I had imagined.

Meanwhile, still no eggs. They were well past their twenty-week mark. Their combs however were quite developed. I became convinced we had a flock full of roosters.

And then there were two. These two were the perfect fowl-friends I had envisioned: I noticed the Japanese beetle problem I had had with my roses disappeared as they duly plucked and gobbled insects. They did indeed cluck contentedly while following me around. My twelve-month-old son would toddle after them declaring “Tchichtens!” If we could keep these alive, at least, I would be happy. We had planned to eat them in the late fall when it became too cold for them to comfortably roam, but I began to make plans to overwinter them, eggs or no eggs (though we were still in a no-egg state).

In mid-October tragedy struck. When I made the decision to run inside for just a minute, I left two contented birds happily picking at the front yard. When I emerged not three minutes later I found two pathetic piles of feathers. Hoping against hope that at least one of them had managed to run back into the coop, I raised the door and looked inside. I didn’t find chickens; I found three small white perfect eggs. It was a sad day in chicken farming.

This year will be different. Unfortunately, free-ranging is right out. My neighbor, who also raises her own fowl, has told me that if the fox doesn’t get them, the coyotes will and there really is no way to prevent the predators from coming. So my husband is building me a fortress: a huge box around the coop made of two-by-sixes and walled with chicken wire. The bottom frame is buried eight inches into the ground, and the chicken wire will wrap underneath the board and extend horizontally underneath the pen area. I am even thinking about electrifying it. Bring it on, fox.

My chicken purchase, like the spring, was early this year. Once again, I went to the local tractor supply store to buy my little hatchlings and asked specifically for hen chicks. The cashier looked at me blankly.

“Or I can look. How do you tell?” I asked her, trying to be helpful.
“Um… you can’t yet,” she told me, plainly confused.

So I picked my chicks (nothing wrong with a few roosters) and left. And then, of course, I started doing my research. Surely there must be some way to sex a chicken.

I talked to people who swore you could tell by the shape of the chick’s egg or the behavior of the chick. One experienced farmer cited body shape as an indicator. While there seemed to be no foolproof way to sex a chick (apply desired human sexual metaphor) there is apparently a best way: look at their cloacae.

This is the method, as I understand it: First take hold of the chick with its anus pointing toward you. Then, gently but firmly, squeeze it like a tube of toothpaste and get out of the way. Whatever feces it is holding on to will come out. Then quickly, before those intestines fill up again, repeat that motion with its anus right in your face. You will see places for three possible bumps. If the bump in the middle is pronounced, the chick is a male. But some male chicks don’t have pronounced bumps. And some females do. So if you’re confused you might want to let them grow a bit and try again. Alternatively, you can just wait for their secondary sex characteristics to emerge.

Yeah. I’m not afraid to get my hands dirty, but I think I’ll take that latter course.

Thursday, March 22, 2012

Attack of the lawn thistles!!!!


This is not a B-rated movie from the 50s. This is my backyard.

Obviously, this would normally be a suboptimal situation. However, with a twenty-month-old baby, who I hope will fall in love with outdoor play, this is a downright terrible turn of events. Thistles are, classically, the symbol of neglected or diseased land; of malcontent and decay. Or, as Hamlet would say, "an unweeded garden, that grows to seed; things rank and gross in nature possess it merely." Not in my backyard, than you very much.

My relationship with thistles has, however, been somewhat confused. In my various travels through the United Kingdom, especially in Scotland, I admired beautifully cultivated thistle gardens. Those old-world varieties are capable of noggin-sized deep purple blooms any gardener would be proud of. The thistle is actually the national plant of Scotland, and is there propagated to purple perfection. According to legend, some Norse invaders tried to ambush a Scottish village in the middle of the night. Right before the charge, one of the manly bare-footed warriors stepped on a thistle and cried out in pain, alerting the Scottish sentries to the Norse presence. So the day (or night, rather) was saved (for the Scottish at least, that is). Just goes to show that the definition of a weed is simply a beautiful plant in the wrong place. The wrong place for those thistles is my back yard.

I thought I had a lot of them a couple days ago, but each time I went outside I see still more thistles! Where are they all coming from?

The thistle is apparently the Trojan Horse of plants: you can't see what's happening until they suddenly surprise you and take over. They spread seed everywhere from July to September up here in Zone 4b, and they thrive with little competition. This seed grows little florets in the fall, if they can, at which time they seek to establish a root structure. If they can do that before the first killing frost, you will see them again in all their serrated glory in the spring. Thus, an early killing frost would eliminate much of the thistle threat. This year, however, we had a very mild winter and a very early spring. The upshot? The thistles thrived. Additionally, the grass and all its competing "weeds"-- yarrow, dandelion, chamomile-- haven't appeared yet as they are slower in growth than the terrible thistle. The result is thistle takeover.

There is though an old-fashioned and fail-safe method to kill these little buggers: regular table salt. Just take the canister outside and sprinkle a good amount in the center of the floret. I used to watch my mother do this every spring as a little girl. This is how it works: if you've ever rubbed a thistle leaf you've noticed (after your initial shock of pain) that they're pretty succulent. The thistle needs this extra fluid to grow. The salt desiccates the leaves and through the plant's circulatory system, the root, thus killing the plant. Voila.

After using all the salt I had in the house (which is a significant amount, as I keep plenty on hand for canning, salting, and pickling), I went to the local grocery and bought another five pounds. When the cashier looked at me askance, I explained what I was doing. She shrugged and replied, "Oh, I always just use an herbicide."I could not suppress a shudder. Putting extra sodium chloride on your lawn and then into the water table probably isn't great, but it's sure a lot better than introducing chemicals-- especially unnecessarily. Yuck. At least the salt is a naturally occurring mineral.

That being said, there is another thing you can do with your thistles: you can eat them. (That's right, you knew I was going to get there eventually.) Thistles have a reputation for being nutritive and healing; the Ancient Greeks advised chewing leaves for minor headaches or body pain, while today's more daring chefs add young greens to a saute or entree. Some herbalists claim that tea made from crushed thistle seed protects against and even helps heal liver damage, while nearly all agree that the plant has antioxidant and anti-inflammatory properties. I personally have never tried this before. If one of my targets manages to escape my notice, perhaps this will be the next experiment.

Monday, March 12, 2012

Homemade Garden Supplies

I faithfully read my various gardening magazines, and am always impressed by these gardeners who have state-of-the-art equipment: I salivate over their cold frames, row covers, cloches, and greenhouses. I plot and scheme about the gardening I could do with such equipment. Then I look at the prices in the catalog-- yikes! To be honest, a significant motivator in my backyard farming endeavors is the simple fact that I really, really hate to spend money. However, I can't live with the idea that there are tools out there that would make my gardens healthier and more productive, and I'm not using them. The solution to this daunting conundrum is obvious: I should just figure out a way to make these things myself.

Through various construction projects, we had amassed a number of old glass windows in our garage, as well as some odd bits of lumber. To make a cold frame, I laid out one of the glass windows and cut some spare two-by-six boards to make a box the exact size of the window frame. I placed the box on the south side of the house right up against the foundation and lined the bottom with black plastic. I filled the box with composted manure, planted seeds, and topped the box with the window. Instant greenhouse. Last year, I was able to grow early and late rounds of spinach and various salad greens due to my little invention... yum.

Though I haven't fully experimented with these yet, it seems that row covers would be fairly easy to construct from spare pex piping by simply cutting even lengths of pipe and arching them over the seedlings, pushing each end firmly into the soil. Rather than look in the gardening catalogs for the actual cloth cover, look on the sale table at your local fabric store. Your cloth should be light colored and breathable-- a light thin cotton is perfect. And much cheaper. Affix to the frame by threading a light-gauge wire (like a craft wire) around the pex at the end of the rows and through the fabric, and twisting closed.

A simple-- although not altogether attractive-- cloche-replicate can be as simple as a milk or juice jug with the bottom cut out and the top off. Although one may not fancy one's garden looking like Christo discovered the redemption center, the results are good. Just don't forget to take them off once the seedlings establish.

Today, I again filled the cold frame with composted manure and sowed seeds for spinach and kale-- we can look forward to delectable baby greens in about forty days. In the meantime, I discovered another full bucket of maple sap which is boiling and bubbling in the summer kitchen right now-- am beginning to feel like one of Macbeth's witches.

The crocuses are out!

Sunday, March 11, 2012

First maple syrup batch-- accompanied by a complete breakdown of willpower

Attempting to be a responsible maple sugarer, I duly harvested a little more than eleven quarts of raw syrup two days after I tapped the trees. At a loss for containers, I gathered all the juice pitchers and empty milk jugs available (with and without lids), poured and stored them in the fridge. Thankfully. That night, a terrific wind storm blew my buckets right off the trees as well as a few shingles off the roof. Only today have I gotten around to re-affixing the taps into the trees and hanging the buckets. By the way the taps immediately dripped, I would guess I have a few more quarts of liquid left to gather.

Yesterday, I began the boiling. All the resources say that you're supposed to boil outside, but we, in our monstrous ancient farmhouse, are blessed with a summer kitchen in which we brew beer and wine, can food, and repot plants-- it is purely a utility room, so I felt no qualms about boiling syrup in there-- I did however crack a window, just in case. (If anyone has ever brewed beer, the general film over all surfaces afterward is nothing to the aftereffects of maple syrup making.)

I began with my roughly eleven quarts of raw syrup. After six hours in a low rolling boil (stirring vigorously about every fifteen minutes) I had about fourteen ounces of usable, delicious, homemade maple syrup! I hot-packed it into sterilized Ball jars (best container on earth) and sealed the full jar for storage. I will put my three-quarters-full jar in the fridge for immediate consumption. I feel an urge to make copious amounts of French toast coming on.

During this process I spent a lot of time in the summer kitchen. The seeds are back there. And the potting soil. And they were staring at me the whole time. Just staring. Boring a hole in my head until I began counting weeks until May 15th. And, you know what, we're only a little more than eight weeks (we're actually about ten) there. And peas and beans are technically cold weather crops. And those Chinese Lantern seeds I bought do need at least eight weeks indoors as seedlings to do well outdoors in this cold, cold climate.

So I started 72 seeds today. I placed the flats on a shelf behind the woodstove so they are warm enough to germinate. Hoping and hoping that spring is around the corner and they can survive. 

But the snowdrops are out, the daffodils are poking through the soil, and spring can't be far behind...

Wednesday, February 29, 2012

Too early to tap trees?


            Three wise-looking, majestic maple trees grace our front yard. Last February, my husband came home unexpectedly with tap kits; that evening he affixed them to the trees and, complete neophytes, we waited for the magic to happen.

            Unsurprisingly, it didn’t. We had no idea what climactic conditions were necessary for obtaining good maple sugar, how often to harvest it, or even what to do when we did. That spring, I happened to visit an acquaintance’s maple sugaring operation, which spanned thousands of acres in Vermont’s Green Mountains and consisted of several million sugar taps. He had them connected to a rubber piping system, all leading down to a sugar shack of his own construction which held several thousand-gallon tanks churning and boiling.

            I may have been just a tad bit intimidated. This looked difficult, to say the least.

            By the time I took the buckets off my own trees that year, I had a few inches’ vaguely sticky mass of yuck at the bottom in which a few flies and bees had been fossilized. Sugaring fail.

This year I did my research. Turns out, there is no exact science to maple sugaring; good harvesters seem to divine it in almost a shaman-ish sort of way. I mentioned in an earlier post that my lilac was budding up; the same phenomenon in your maple is a good sign that the sap is rising.

Before tapping, the tree needs to be above freezing—that is, you need four days or so of 40 degree weather. A sugarer I spoke with actually waits for small buds to form on the branches to prove the tree is, again, alive.  As I understand it, during winter, the tree’s cells store its food source in a starch form; when the tree gets its springtime cues it liquidates that food into sugar form as a growth jumpstart. Once temperatures are higher (consistently above 45 degrees) the tree converts that food source back into starch for slower consumption. The takeaway from this? Get it while the getting is good. Once you recognize the necessary signs and weather conditions for your trees, you should tap immediately and then enjoy 4-6 weeks of production in a normal year.

This, however, doesn’t seem to be a normal year.  After hearing a story on North Country Public Radio (my lifeline: see the article on Early Adirondack Sugarers ) on early tapping going on in the Adirondacks due to elevated yearly temperatures, I decided to just bite the bullet and tap my trees.

It is surprisingly easy. I had a hammer, an electric drill gun, a 7/16 drill bit, and the standard maple sugar kit from the hardware store. I chose a spot at my level (apparently vertical level doesn’t matter, but you should drill at least six inches away from a previous drill site) and drilled at about a 60 degree angle upward into the tree (to catch downward sap flow) as far as I could, moving the drill in a circular motion to enlarge the hole enough to fit the tap. I withdrew the drill and waited a minute; sure enough, a clear, thick sap came flowing out of the hole. I stuck the tap in as far as I could, then used a hammer to knock it in as far as it could go. I used some spare PlayDoh (all I had was orange) to putty around the tap so that sap couldn’t escape (I’m sure other more durable materials would work for this). I then attached the bucket and waited for that sweet, satisfying drip… drip… drip… on the bucket floor. Mission accomplished.

Apparently, one must treat the raw syrup as a dairy product: don’t leave it out too long. Collecting every other day seems to be optimal. Store it in the fridge until boiling. Expect a volume ratio of 40 (raw sap) to 1 (maple syrup).  Additionally, one is supposed to boil the syrup outside and for many, many hours over a wood fire because it is so messy.
           
            I am wondering (a) how I will have time to stand outside boiling syrup for multiple hours and then (b) why I actually care as we don’t ever eat maple syrup.

            The answer to (b) is easy: it’s the principle of the thing, damn it.

            Stay tuned for the answer to (a).


Sunday, February 26, 2012

Eating Your Lawn: Part I

When we were children my brother would complain tearfully to our parents that I was making him eat the lawn. He was telling the truth. Seriously, there are lots of lovely things to eat out of the lawn. Following are a few particular favorites.

Yarrow: On the lawn, it looks like a small green feather. If allowed to grow to maturity, it grows to a foot or more in length and sports an umbrella-like white or yellow blossom made up of smaller flowers. It has an ancient reputation for its medicinal power, specifically, as brewed in tea to prevent and cure illness.

Dandelion: Though usually viewed as a weed and pest to lawn-groomers, a dandelion in all its parts is delicious! Pick the young greens for vitamin-packed salads. Saute buds or mature flowers in olive oil for colorful and nutritious side dishes and garnishes. Yum. `

Chamomile: To my husband's chagrin, this herb stubbornly grows through the stones on the driveway. It is distinguished by its yellow, daisy-like flowers, and distinctive smell. When brewed in tea, it has a wonderful calming effect.

Clover: Delectable in a salad and delicious in a tea. And very, very good for us. 

This comes to mind as I spent the afternoon taking down the herbs I had hung to dry in the fall and crushing them into small glass containers for cooking use. As any northern gardener has discovered, beggars-- for a longer growing season, that is-- can't be choosers, and I will harvest and preserve whatever I can find. Lucky recipients of a pre-loved home, such as mine, might look for herbs that the previous lover has planted; for example, I am lucky to have inherited well-established sage and lavendar bushes. I love to use ground sage on any red meat as a rub before cooking. Lavendar works wonderfully in sachets to scent freshly laundered sheets, and to keep mice and moths out of sweaters.

Ancient coffee grinder qua herb smasher-- thanks garage sale!
And as proof that the oldest tools really are the best, the most effective ways I have found for grinding and crushing herbs is with an old-fashioned stone mortar and pestle, and a crusher originally meant for coffee beans that a friend picked up for me in a garage sale. Unlike in a food processor or blender, there is no residue or waste.

P.S. It occurs to me that the illustrated apparatus might be exceedingly easy to make; you'd need:
a widemouth mason jar
a widemouth ring and lid
a short metal skewer stick
a spring, like the one you'd get out of a legit ballpoint pen
a blade out of an old food processor
a wine cork
some craft wire

Directions:  Use the skewer to punch a hole in the middle of the mason jar lid. Superglue the mason jar lid and ring together; let set 24 hours. Slide the spring onto the skewer.  Top the skewer with the wine cork to protect your hands and keep the spring on. Thread the end of the skewer through the mason jar lid. Once through, Fit the end of the skewer into the hole in the middle of the food processor blade. Secure with super glue and also with tightly wrapped craft wire. Allow to dry 24 hours. Smash away at herbs!

Saturday, February 25, 2012

By the way, the current issue of Organic Gardening has a great article showing that sustainability is possible on any lawn: http://organicgardening.com/living/earthworm-economics. Enjoy!

Spring Fever


  About this time of year I tend to get a serious case of spring fever. In previous years, unable to contain myself, I have started seedlings in late February only to have them (a) die, because we keep our house at 55 degrees; (b) die, because they got so spindly; or (c) survive in a stunted, pathetic sort of way, requiring a lot of attention and producing practically nothing. This year, I am determined to be more self-disciplined. To scratch the itch, however, while still keeping my resolve, I have ordered my seeds online from Gurney's and Miller's. I have always wanted to try seed ordered from an actual seed company versus seed bought, say, at the local drugstore and compare the results. Additionally, you can instruct them not to send you your seeds or seedlings until the appropriate time-- I thus physically can't get ahead of myself this year as I won't have the seeds yet. Genius.

Gurney's is currently having an online sale until March 4th with 15% off everything and free shipping with really reasonably priced seeds and plants; go to www.gurneys.com.


To further mollify my garden longings, I can solidify my garden plan. I am a big proponent of companion planting as it makes sense and works well. I've been loving Carrots love Tomatoes & Roses love Garlic by Louise Riotte, who also writes for Organic Gardening magazine. It's such a fantastic reference that I'm actually reading it cover to cover.

In the meantime, I'm taking comfort in the fact that up here in Zone 4 spring can't be far away-- the lilac, nature's springtime soothsayer, has buds already!